I've started testing out some of my first, and simplest, projects; the glow bottle. This project is NOT the same as all the DIY glow jars that you can find online. Most of the glow jar type stuff that I've seen has you break open glow sticks to get the glow juice out of them. They look very impressive, but those reactions don't last forever. They have the advantage of glowing on their own for a bit, which I'm sure is nice, but what I'm going to show you is completely reusable (a necessity if you build on your decoration collections every year) because it doesn't use a glowing chemical. Unfortunately, I don't get to take credit for the idea on this one. Credit for this goes to my high school chem teacher. I don't know if it was her idea originally, but she's the one I heard it from. I'm just glad I haven't forgotten about it; I took that class over 10 years ago. Paying attention pays off! Anywho, one day in HS chem we were talking about electrons and energy states. When we came into class there were several bottles full of colored liquid on her desk. Turns out the bottles were to be a visual aid. There was a black light behind them and turning it on caused the liquid in the bottles to fluoresce. The glowing happens because the UV light changes the energy state of the dye. Needless to say, we were all quite impressed. Then she told us how to make those bottles. It's really very simple. The color comes from highlighters and is cunningly extracted with water.
DIY Glow Bottles
 |
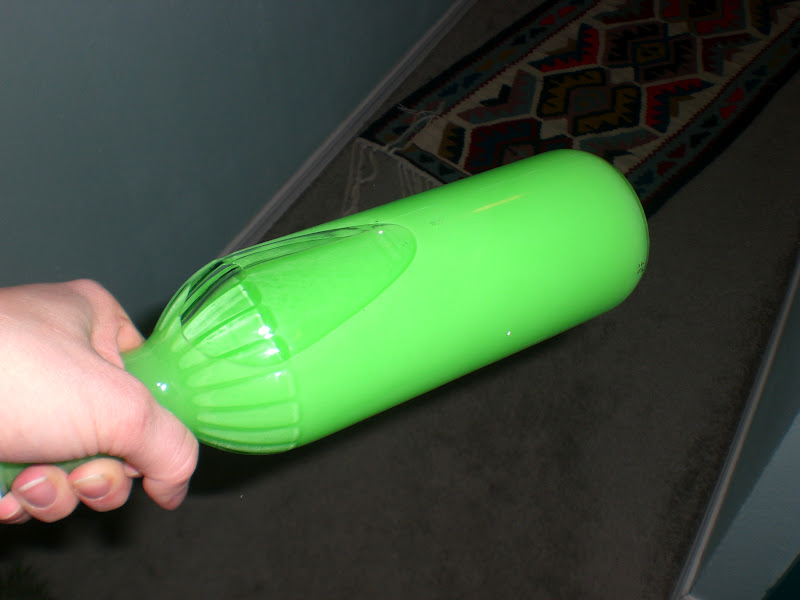
| Sorry it's a little blurry. I had to use a longer exposure time to be able to photograph in the mostly dark and I had to hold the bottle nearer the light for a better image. |
This is not a project that you should allow kids to do unsupervised. Between the hammer, ink, glass, and any metal on the bottle that might need removing there are a lot of opportunities to get hurt or make a huge mess or both. Plus there's the alcohol to consider. Make sure you take appropriate precautions to prevent damage to your child, yourself, and/or your stuff.
You will need:
1 clear glass bottle that is water-tight. Screw cap wine bottles work well, as do fish sauce bottles, and probably many other kinds as well.
1 highlighter
plastic bag (to be used as a drop cloth)
gloves (optional)
a hammer
warm water
1 shot of high proof, clear alcohol or rubbing alcohol
A quick note about the highlighter. You can, of course, use any kind that you want. However, yellow, orange, and pink typically give the best results. Blues and greens don't generally work as well. I'm guessing it's a wavelength issue, but I was never super great at physics. The colors that we see are the colors that are reflected by an object but if the light in a room is close to the same color as the object they are harder to tell apart. Also, you'll need to make sure that you don't get the kind of highlighter that has loose, liquid ink that you can see in it. I'm sure they would work but I'm also pretty sure that a lot would be lost when you crack the thing open. The orange bottle I made used a fat chisel tip highlighter that said only "highlighter" on its side. The green highlighter was a Bic brite liner and I must say I was very impressed with how quickly it gave up its ink. You can see the ink seepage on any of them, but with that green brite liner I could actually watch the white inkless region grow. It was very entertaining.
You'll want to clean up your bottle before you use it. Rinse out the previous contents thoroughly. Fill the bottle with water and cap. Then submerge the bottle in a container full of hot tap water; I used my sink. Let the bottle soak until the water has cooled enough for you to put your hands in it and start scraping the labels off. Focus on getting the paper off first, the adhesive comes off pretty easily by rubbing it with a washcloth. Don't use steel wool, green Scott's pads, or anything else metal or abrasive because they can scratch your bottle. Drain and dry your bottle.
 |
| My bottle had a metal band on it that I didn't want. I used a needle nosed pliers to grab and gently pull the metal off the neck of the bottle. Be careful, you could break the bottle or cut yourself on the metal. |
Next you need to get the ink felt out of your highlighter. I tried breaking the plastic with pliers, which ended poorly. It was just a little pinch, but it did draw blood and that was with me being careful. Since the pliers didn't work I switched to the next most dangerous...I mean logical...step. I got a hammer. I then took my highlighter to the garage (didn't want to risk damaging the floor tile in my house) and gently tapped it with the hammer. It really didn't take much to get it to crack open, it felt like I was just lightly bouncing the hammer off the highlighter. Once you have the casing on the highlighter cracked open, you can take out the ink felt. Be careful not to drop or squeeze the felt tube or it will goo all over and I'm fairly certain highlighter ink stains. I didn't get ink on my hands, but had I gotten over-enthusiastic with the smashing I probably would have. I used my gloves anyway because I wasn't sure what the felt was going to do. Use your judgement; if you think it's going to be messy, cover your hands with a baggie or gloves.
 |
| Attempt number one did nothing but hurt my hand |
 |
| This is why you should always be careful and then some. Even being careful doesn't always save you. My pliers bit me. It's a tiny ouchie, but an ouchie none the less. |
 |
| The hammer did a much better job. In case you're wondering, I brought the pen back to the table after smashing it on my cement garage floor. I did not smash the pen on the table. |
Fill the bottle most of the way with warm water then add a little bit of alcohol as a preservative. Then drop in your ink felt. The ink felt will immediately start leeching into the water. Simply let it sit until the water is fully colored. It doesn't make a huge difference to the end product, but if you leave the ink felt alone and don't shake the bottle you will get all the ink out. If you shake the bottle, your ink felt will have a tint to it (it's a concentration/osmosis thing. I could explain it but I suspect most people don't really care). Again, it isn't a critical issue, but I prefer having a 'clean' felt to remove. Since the ink felt floats you can take it out once all the color is extracted. The other thing to do is to fill the bottle up as full as possible. This removes air space and that plus the alcohol should keep your glow bottle from growing anything unpleasant. I made the orange one in February so that I have time to watch for icky things growing and warn you about them (it's been a month and no icky yet!). I'll update the post should it grow anything.
 |
| Ink felt. All you have to do is pull it out. The way highlighters are made the nib sticks into the felt, they aren't actually attached. |
 |
| In the bottle |
 |
| Add water then alcohol |
 |
| And soak. I sat and stared at it for a while; it was neat to watch the ink drop out. You could probably use it to explain about currents, osmosis, and density; the ink drops to the bottom of the bottle and won't go above the end of the ink felt unless you shake the bottle. |
 |
This is after about 24 hours of
soaking the ink felt and giving the bottle a quick shake. You can then take the felt out (so you don't have it in the final product) and fill the bottle completely. |
 |
| And this is what the ink felt looked like afterward. The reason it isn't pure white is because I shook the bottle too soon. If I had left it alone I would have gotten all the ink out. |
To display, put your bottle(s) near a black light and enjoy!
OK, so I know this pic doesn't look amazingly fantastic but it is really hard to get good pics with my camera in blacklight. I took this one in my bathroom because it was the only room without windows so I could darken the room. I only used one blacklight and I put it into the fixture in the bathroom. This shot was a 'set it down and see how it does' shot which is why the bottle doesn't look as good as it does in the first pic on this post. The closer to the light, the better your glow will be.
Just for reference, I use Ecobulb blacklight CFLs which are 60 watt replacements. I'm sure other companies make CFL black lights too but those were the ones I was able to find. They don't seem to be stocked at normal stores; I got mine at a hardware store. You can also buy fluorescent tubes and fixtures or incandescent blacklights but I've tried to avoid that so far and I'll tell you why. First, I can buy 3 or 4 CFL blacklights for the cost of one tube+fixture. I get a lot more mobility out of the lights that way without having to keep buying more lights. Second, CFLs fit in standard house hold light fixtures so you don't have to fuss with them. Third, unlike the incandescent blacklights I've had in the past, the CFLs can actually light a room. Standard incandescent blacklights are only 25 watts which means not only are they dim, you need a whole lot more of them. Incandescents are a lot cheaper, but the CFLs have been more than worth the extra so far.
 |
| Here's my green bottle. In this shot it's only been about 5 minutes since the ink felt went in and already you can see the white showing up on the end. |
 |
| In the same amount of time this is how much ink had already leached out. |
 |
| This pic was taken maybe 10 minutes in. |
 |
| And then maybe another 5 minutes later. The ink felt is already over an inch white at this stage. You'll notice that there is ink above the bottom of the ink felt which doesn't typically happen. It turns out there was a seam on the ink felt and it started leaking from there too. |
UPDATE: I have more colors now! The pink (on the right) is a little anemic, I'll be adding more ink felt to it to see if I can't beef it up a bit.
That's pretty much it as far as making the bottles are concerned. Now, if you'll bear with me, I'm going to take you backwards for a minute. When I was going on about how to get the best color results from your highlighters it occurred to me to try an experiment. You'll remember that I told you that blue and green highlighters don't work as well as pinks, oranges, and yellows. Well, I started thinking about that as I was writing up my post. Hang on to your hats, we're about to get geeky!
The Science of Light and Color
There's a bit of science that needs addressing because my thoughts won't make sense otherwise. Those of you who remember about the visible spectrum and wavelengths, or just want to see how the story ends, can just skip over this bit. The visible spectrum is the rainbow colors of ROYGBIV except that scientists like to call blue "cyan" because we call indigo "blue". We're special like that. Red has the longest wavelength which makes it the slowest and violet has the smallest and is the fastest. Next to red is infrared which has a longer, slower wavelength but can't be seen by people. This is what infrared (or IR) cameras use to record in complete darkness. Watch a ghost hunting show, they use IR cameras in the dark because they don't need the same light we do to see by. On the other end is faster light with a smaller wavelength. It's ultraviolet (UV) light which we also can't see but is emitted by blacklights. Blacklights do give off a purple light but that isn't the actual UV. The purple/blue we see from black light is where violet light overlaps the UV light. We can only see the effect of the UV; making things glow, or 'fluoresce' as scientists call it. Like I mentioned earlier, there is some overlap in colors. Blue overlaps with violet a little bit just like violet overlaps a little bit with ultraviolet and so on. That will be important in a little bit. The colors we see are the result of the light color that is reflected off an object. If you see something green that means that object is soaking up all the other colors but bouncing the green back at you. Now, for the orange bottle to glow, it soaks up all the colors besides the orange and bounces the orange off for us to see. The orange doesn't blend in with the violet we see in the room because it has a very different wavelength. Orange is 5 colors away from UV on the spectrum so there is no overlap. Blue, on the other hand, has a problem. If I made a blue bottle it would only bounce the blue color back for us to see but blue is right next to violet on the spectrum. That means there can be some overlapping between the two. So if the light around you is blue/violet and the object is bouncing blue/violet back at you the object is going to be harder, if not impossible, to see.
And now we get to why I gave you a mini science lecture. The blue highlighters do tend to have deeper colors on paper and on paper it looks very similar to the light that black lights give off. Given that information, it makes sense that there would be a wavelength issue for blues (hard to see = doesn't glow well). But what about the green? After all, the greens look as bright on paper as the other colors do and I know I've had neon green stuff light up under UV light before. Plus green is farther down on the spectrum, not by a lot, but it's past blue so there shouldn't be wavelength issues. Then I had an idea. What if the green only shows up in neon when it has a white background? If that's the case, all I should have to do is make the bottle cloudy to get the green to show up better. This is where my time surfing the interwebs for ideas comes in really handy. It just so happens that something called "clouding agents" exist. You know how some Kool-Aid isn't see through and always has that white stuff in the bottle of pitcher? That's a clouding agent. There is also a clouding agent, known as liquid whitener, which is used to make lollipops opaque. Guess what I went hunting for?
It was a lot harder to find that I thought it would be. Impossible is probably a better word. It seems that craft stores are better prepared for people who want to make suckers out of chocolate rather than sugar. So, instead of waiting on an internet order, I picked up what I hoped was the next best thing. White-white icing color. There were only two types to choose from so I picked the one made by Wilton. Not because it was a Wilton product, but because it only has three ingredients. The other one had stuff like citric acid and lots of preservatives in it but the Wilton one only had titanium dioxide, glycerin, and water. None of those things go bad easily and none of them are commonly used by bacteria for survival. Bacteria can live on citric acid and a number of the other things in the other dye and that's why I avoided it. Armed with my new find, I set about my experimental design.
I decided to test two things. First, how well the whitener works and second, if my hall bath had enough UV to make the bottles look good. I had wanted to test the lighting anyway, so I figured I could do two experiments at once and save some time.
Starting with the whitener, I had to make sure the liquid whitener doesn't clump up in water even after alcohol has been added. Since there is no standard way to cloud glow bottles, unless I invent one I suppose, I also had to figure out how much to use. I grabbed a little glass jar with lid (so I could shake to mix) and put a bit of water and alcohol in it. It looked to be about 6 ounces of fluids. Then I put three drops of white-white icing color in. They sank to the bottom almost immediately, glycerin is more dense than water, and looked neat enough to give me another craft idea but that's for another day. Then I closed up my jar and gave it a good shake. I set a timer and let it sit for 5 minutes and then 10 more minutes to see if the white settled out quickly or not. Then I let it sit for most of the rest of the day for the same reason. It sat for about 8 hours total.
 |
| Food color drips into the water. Looks pretty neat. |
 |
| After a quick shake the whole thing was solid white. |
 |
| 2 hours later you can see a heavy line developing on the bottom. |
 |
| 4 hours in and not only is there a white line on the bottom but you can also see a small clear section at the top |
 |
| 6 hours after shaking and it's pretty clear the color won't stay in solution. |
 |
| After 8 hours all the dye has pretty much fallen out of solution. That's glycerin for you )-: |
For the main test I thought about making two bottles of green, but that seemed a little wasteful. Instead I used just one bottle of green and later added the whitener.
On to the lighting test. Since I plan on using more than one black light, I decided to check how well my bottles work in their display site. So I needed to replace all the normal lights with blacklight CFLs in the bathroom where the bottles will be displayed. My hall bath has 3 lights so I grabbed 3 blacklights and went to work. One of the fun parts is having to keep the lights I'm taking out off so they don't get too hot to touch. This is where the hall lights and my Scentsy plug-in come in really handy. They give just enough light for me to be able to switch everything out. I set up in the evening because I didn't want to leave the bulbs in all day, so that little bit of extra light was necessary. I could have put the lights in earlier, but I chose not to since I would have to wait until dark to test the bottles and I didn't want to leave the lights in all day. I tend to get distracted easily, you see, and would be seriously confused if I tried to use that bathroom and the lights weren't what I was expecting. Sad but true, I do things like that all the time.
Now, to make sure the test is fair I needed to put the green bottle in as close to the same position as it was before I added whitener. In the photos you'll see little sticky tabs that I put down everywhere that I shot the bottles. I did both the green and orange bottles so that I could see what a "good" response was. And here's what I found!
 |
| This is a pre-whitening shot. I'm not sure the orange bottle is bright enough, even with 3 blacklights in the room. You can see the light is working on the silk flowers, too! |
 |
| The tabs I used for marking position were black light responsive. It's hard to tell from the photo, but the blue and green tabs didn't glow as well as the other 3. |
 |
| Position number 2 and the green doesn't look any better. |
 |
| Unfortunately it doesn't look any better after having 6 drops of white-white added to it! |
 |
| I held it up to the light just to check. No dice. |
 |
| No better in position 1 |
 |
| I must admit that the bottle looks better in normal light after the white-white dye was added. It may have potential, if not under blacklight. At least I was right about the white making the green look brighter! |
 |
| At this point I finally thought to check if the whitening was blacklight responsive. I'm guessing that was the problem but I have no idea what to do about it. |
 |
| All the bottles at the end. |


great experiment. I'd like to try it with my children when they're a bit older...
ReplyDelete