Pages

Sunday, September 25, 2011

Behold! The Arm! part 1

The wait is over! The newspaper has arrived (so have my LED lights!)! Thanks to the work of several friends and my mom I now have enough material to start making things for real. The 'mystery project' from the other day is still paused because I needed to start working on a decoration that is going to hang in front of my front door for Halloween and the mystery one is an extra. Initially, I had wanted a spiderweb-wrapped mummy that shook and screamed. That is, until I actually saw the thing (see earlier post). I've designed something I think is far better. Select bones and cloth(to be like old rotted clothes) and spiderwebs. If it works right it should look like a desiccated spider victim. Since I normally web over my entryway pretty heavily it should fit right in.


 I used instructions from this website, it's one that I highlighted in an earlier post about snot rag maché. The instructions it gives are pretty simple. Making newspaper do what's in the instructions is surprisingly challenging.


 Above you see the first steps. Roll some paper into a tube the length(ish) of an arm and tape it in place. Make sure the paper is secure before cutting from one end toward the center. Remember, the humerus is longer than the radius and ulna. Then you have to make the cut portion into the radius and ulna.  That's where the first major challenge comes in.


I used between 4 and 6 sheets of newspaper and rolled that.  When I cut it, as you saw above, it took on a life of its own.  Apparently it wanted to be a squid.  Since I disagreed with that purpose, I had to make it do what I wanted.  


 The two images you see above are the first steps of what I did.  First I taped the end of one section.  The was mostly to hold it in place so I could tape the 'bone' the rest of the way.  Then I had to cut that first taping, re-position the bone end, and tape it down again.  It was making the second bone that was hard (shown below).  The paper had bent back and didn't really want to form a tube.  It took quite a bit of effort to tape the end of the second bone so that I could work with the rest of that section. If you look near the 'elbow' area you can see where the paper tried to tear.


 The end result was pretty impressive though.  You can see that the radius and ulna try to twist around each other which is what they do in the arm.
 For optimum arm definition, though, I needed the lower arm bones to be separate a bit.  Because the paper was so stiff I couldn't hold it in one hand and tape it with the other.  I had to stick something between the bones, in this case my cable remote, and then I was able to tape the ends together and get some space between the bones.  What I didn't get a picture of was the bending of the elbow.  That was easy, I gave it a slight bend, it was maybe 20 degrees up from flat, and taped it down.


 Any decent arm has fingers.  So that's what I started next.  I tightly rolled some newspaper and used my own extremely long and bony fingers as a model for how long the fingers should be


I quickly decided doing it one finger at a time was dumb.  So I rolled a longer and smaller tube, marked where the fingers should start and end with tape and then cut the taped section.  That kept it from unraveling.

If you use this method of finger making there is a section of the rolled piece that you shouldn't use.  The very ends of the rolled piece have the least amount of paper and are really weak.  You have to find where the paper is a little thicker for it to be nice and strong.
If you look you'll see that on each of the 5 fingers there is tape on both ends. That became my easy way of knowing where each finger would be on each roll of paper.  It took me a bit to get tubes of a size I liked, I made 4 tubes total but only used 3 of them for parts.


Here you see the hand assembly.  The instructions say to make one side flat and then use the other side for definition, depending on what will be visible.  Since this required tape in a specific way, I laid out what I thought I would need and built the hand on top of it.   
Once the fingers were in position, I started layering tape over the top which is the back of the hand.  To give it bone definition I attached the tape to the left side bottom tape and then slowly pressed the top tape down as I laid it over each finger bone. Getting in between the fingers was the tricky bit here.  It helped a little if I rolled the finger I was working on to the left as I was trying to tape down the other side and in between fingers.  Once I had all the fingers down I taped to the bottom of the finger bones and wrapped the tape on itself.
The amount of tape on the metacarpal area was clearly not enough but I wanted to be able to bend the fingers easily so I measured the hand with my hand and marked the knuckles with pieces of tape.


I told you before I used my hand as a model.  I did actually take pictures of my hand to refer to as I was bending fingers but then realized it was just as easy to hold my hand out and look.  As this is a spider victim I figured the hand should have an almost natural relaxed look.  I say almost natural because the body would have eventually been desiccated which tightens skin so the fingers would be curved more than what a living hand would be when relaxed.  At least, that's what I remember from the mummified frog I once found at an archery range.


This is the finger bending process.  I started with the little finger end joint and curved the finger around as per the instructions "bend the finger and then tape the bend tightly" which is actually more difficult that it sounds if you only have 2 hands of your own.  I worked from pinky to thumb and made sure to bend the finger on my marked knuckle joint as well.  That was tricky because the tape didn't really want to bend. Soon I had a delightful piece that actually looked like a hand.  Then I had to attach it to the arm.
One look at your own hand will tell you that, unless you make it that way, your hand isn't flat.  To get that natural look I overlapped the existing tape (which wasn't sticky because that's the tape to tape area below the hand) below the hand onto the end of the arm bones forming the wrist.  Then I formed the curvature of the hand by wrapping that section around the arm bones and taping it down.  Then you flip it over and do the same on the other side, taping to the contours of the palm side.
And voila!  One arm.  You can see that I wasn't quite finished yet.  The hand looks good but the fingers are really super long because the palm doesn't go all the way to the knuckles like it should.


Adding a little more tape to the front and back of the hand for the palm was really easy, but I did have to cut out a bit between the thumb and index finger so that it didn't look webbed.  And there you have it, one arm ready for fleshing!  That's part 2, as you might have guessed.

Monday, September 19, 2011

Musings of a Halloween Crafter

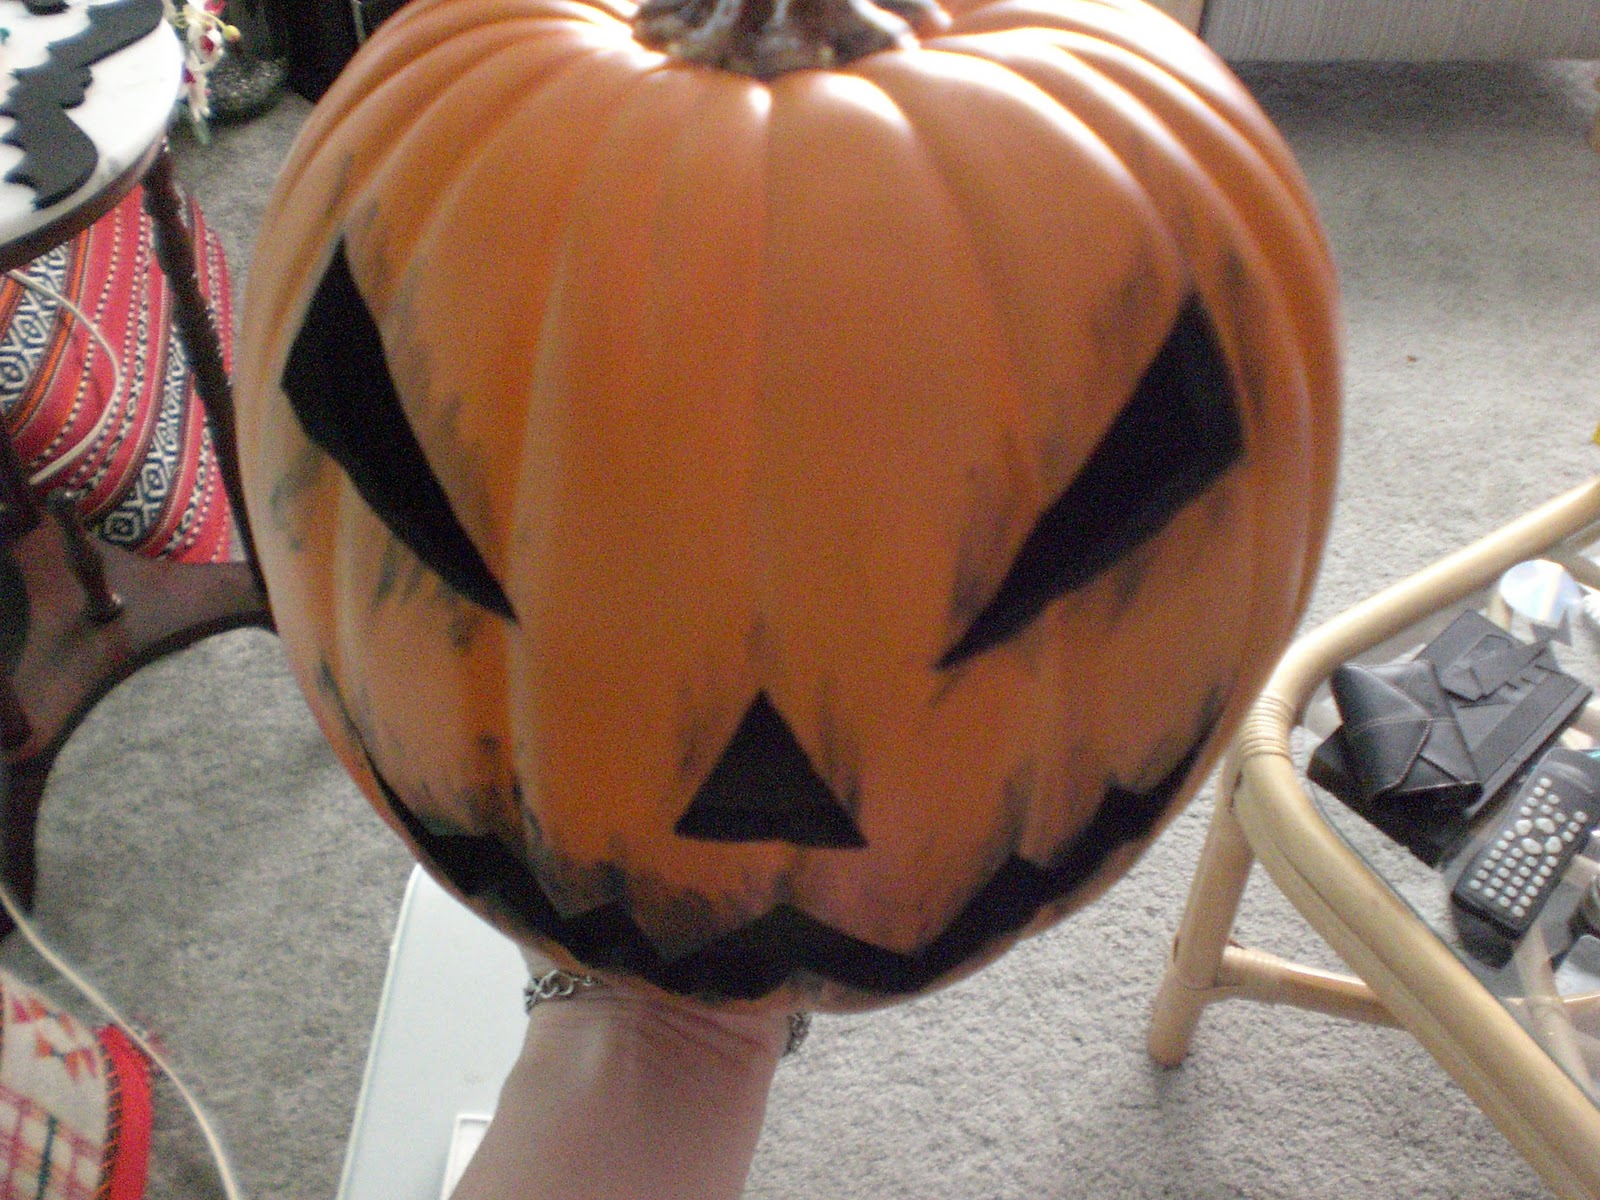
OK, so my pumpkin head is totally unrelated to this post, but I spray painted his insides this weekend and wanted to show him off now that he's dried out.  Looks a lot better with the dark insides, no?


I think I may be on to something with this whole 'make my own decorations' thing.  Once you start thinking about it, there really isn't a limit to what you can make out of newspaper and paper maché.  My spider nests are coming along quite nicely.  I'm working on what to do with the balloons holding them up, and what I'm going to do with them.  Perhaps I can get some spray foam and fill them in so they're a little more stable.  That will probably make them too heavy though.


What really makes me sad is that I'm still waiting on some newspaper.  I got a boon over the weekend; as I opened my garage door to embark on my errands when lo!  what do I see shining at the end of my driveway but a plastic wrapped bag of newsprint!  Sadly, it was only ads for places I don't go.  I had hoped it was one of the periodic "hey!  look at this newspaper!  wouldn't you like to buy more?" newspapers.  However, it was just enough for me to play with.  Well...kinda.  I couldn't actually complete anything with the paper that I had. I mean, there's only so much you can do with 6 sheets of newsprint.  Once I get more though, oh yeah.  Good times will be had by all.  What was I working on, you might ask.  Part of me wants to be vague and mysterious.  Part of me wants to show off.  (-:  Plus I'm starting to get good at remembering to take pictures so everyone can see my insanity.  So, I decided to give you a teaser.


No, it is not a bicycle seat.  It does rather look like one, but it isn't.  I'll also tell you that I have added to it, it's nothing like close to done, and it already looks AWESOME.  Another hint, after I got this far I only had 3 sheets of newsprint left to play with and if I showed you what it looks like you would instantly know what it's going to be.  Assuming you haven't figured it out yet


I also ordered my red LED submersible lights!  I'm quite excited about them.  Why do they need to be submersible?  Dunno, I haven't decided what I'm going to do with all of them and I thought it best to be prepared.  I will soon be getting 20 of the little things and we'll see how one looks in my pumpkin head.  Squee!


Sunday, September 18, 2011

I Think I'm Gonna Need More Glue...

Today is the day of glorious corpsing!  For those of you unfamiliar with the term, corpsing, sometimes known as 'fleshing', is a process of using a special kind of paper maché to make a skeleton look like a rotting corpse instead of a boring bag of bones.  I quickly discovered that there is an entire community that does this and there are a number of different ways to go about it, depending on the look you're after.

Some terms you'll need to know if you start clicking through links.  'Bucky' is the term for a certain type of skeleton that you can buy.  They can be pretty pricey, most I've seen run about $120.  However, they are anatomically correct and are typically 4th quality.  For reference, a first quality skeleton is damn near replica quality and is what they use at hospitals and medical schools.  The cheapest first quality skeleton I've seen ran about $1500.  'Blucky' is a blow mold skeleton that is also to scale if not anatomically correct.  These you've probably seen and you might well own.  They're the plastic ones that you can get at almost any store.  You know the ones, no real definition in the rib cage or pelvis, goofy looking skull with they eyes painted black.  Mine had some glow in the dark stuff sprayed on it when it was new.  They look kinda cheesy, but they are much more affordable.  These are the sort of things that people corpse.

The first method I'll tell you about is pantyhose corpsing.  You can find detailed instructions and pictures here.  Basically, what you do is cover a skeleton in carpet latex and then pull pantyhose over it.  Then you shred the pantyhose and stain the thing.  It gives a really stringy look that, to me, looks more like a cobwebby skeleton than a corpse.  But, people seem to like it and think it looks more like flayed skin.  More power to them.  

A method that looks neater is the netting or cotton method.  This method, shown here, gives a much juicier looking corpse, but it has the disadvantage of looking more like skeletal remains than an actual body.  There is also a bit about using foam in this one, though they don't use it anywhere near as much as for the next one.

Foam corpsing is pretty badass.  I've notice that foam tends to be used more for charred corpses, and for good reason.  Just a quick note, if you're squeamish do NOT click through this link.  For a prop, it's pretty graphic.  A brilliant tutorial on foam corpsing can be found here.  Like I said, they're pretty awesome.  They take way more time and materials than I can swing this year though, so let us move on.

One guy does some pretty awesome work with trash bags or drop cloths and a heat gun.  The corpses look a lot different than the do with some of the other methods, but it looks stupidly easy to do.  He has a ton of posts on YouTube but this is the one for corpsing.

My preferred way to corpse is something called 'snot ragging' or 'snot rag maché'. Delightful, is it not?  In this method tissues are used to maché a skeleton or skeleton construct.  The sites I've been relying on the most are here and here.  I picked this way of corpsing for a few reasons.  The most important of which is that you don't need anything fancy to do it.  Hell, you don't even need a skeleton.  All you need are newspapers, tissues, tape, and maché paste.  If there is a cheaper way to corpse, I haven't found it.  What's more, the corpses actually look like corpses instead of fancy skeletons.  


I didn't want to start with a full skeleton because I'm lazy and cheap so I thought spider nests.  They have similar texture to some of the corpsing things that I've seen and they can be small.  Also, since they are small it won't matter if they don't work out because there won't have been as much material used.  I tried out the maché paste from the first of the snot rag links; that's the one that uses glue and water mixed with cornstarch.  I don't know that it's any better than other maché pastes but I figured it wouldn't hurt to try.  
Here we have the bits I put together.  Spider web, tissues, balloons, and the glue mix
Started with the cornstarch
Added glue


Added water
Mixed until smooth...ish.  Yeah, I'm lazy.


 Here we have the tissues.  They recommend using 2-ply tissues but they also warn that the stuff makes a hideous mess so I put out wax paper and set the tissues out a head of time so I wouldn't gum up a whole box of them.


Here we have the beginning of the spider nest.  I don't have any other pics of the process except for a first shot because it is SOOOOO messy.  You can see where the double ply comes in handy.  That's what makes all the nifty texturey bits.


A little time and a lot of paste later (and I do mean a LOT of paste.  I had to keep making paste for this.  Tissues soak up an incredible amount of liquid.  You will need tons of paste, about 4x more than you think, if you do this) I had this.  In addition to being lazy I am also horribly impatient.  I figured that I was already doing laundry and hanging it up to dry so I might as well hang my project up too and see if it dried any faster.


Now, for the first ball I made, I dipped the tissue in the paste.  While I was doing that I wondered if it might be easier to coat a balloon in glue and then layer the tissues on.

 Same sort of thing. But, since it is supposed to be a spider nest I figured it needed some spider webbing.  I stretched out some of the decorative webbing and wrapped my mess in it while everything was wet.  It too got hung up to dry.


An interesting comparison, I feel.  The unwrapped one looks rather like a beehive to me.

 Back to me being lazy and cheap, I had saved the leftover paper towel bits from my Mummy Head so I thought I would see how that looked too.

I left them all outside for something like 5 hours but they were still a bit moist.  Once they're dry and I pop the balloons I'll post the end product.  I'm not sure I like the spider next idea, but I really like corpsing.  I think the snot ragging will make some pretty awesome props.  I'm designing a spider victim corpse but it requires me to have newspaper.  I don't get the newspaper so that has to wait until my mom brings me a few weeks worth.  (-:

Saturday, September 17, 2011

Super Simple DIY

Just a forewarning, this DIY is kinda dull because I've had a rather long day. Doesn't make it any less necessary though. With any kind of luck I’ll have an awesome DIY up in a few days. I'm learning to corpse things you see, and that means practicing something called “snot rag maché.” (-: For now though, all you get is my Worm Pot and the ideas that go with it. Rather bland, I know, but for an amusing purpose.

My Halloween party is more than just the chance for me to decorate things up, it's also when I get to make fiendishly gruesome food to attempt to feed people. It normally takes some cajoling to get people to try the things on my table, I try to make things realistic as possible. In this case there are some gummys that I've been wanting to try out for a few years now. Oriental Trading company has some gummy worms that are so much more than just gummy worms. They look exactly like earthworms! Now, I've tried gummy stuff before and honestly it didn't go so well. I got a gummy hand and a gummy foot, both with sugar candy bones, and they were absolutely dreadful. Hence being a bit wary about the earthworms. But, in the words of Eddie Izzard “70% is how you look” so my earthworms must be displayed in the best, or worst I suppose, possible manner.

Since earthworms are found in earth, I figured that would be the best way to serve them. Real earth being rather untasty I needed an edible alternative and a way to display it. I'm still working on the earth recipe, but I've come up with a way to display it. Enter the Worm Pot.

I found a terra cotta pot at Lowe's that looked to be a good size for a serving dish. Trouble is, terra cotta pots are horrific only in how boring they are. I needed a way to creepy it up. I've aged cloth and paper before, but never something so rigid. The only thing I could think of was paint to distress my pot. I dug around in my craft closet and turned up some black, brown, white, and glow in the dark paints.   


I figured that layering would give the best results, so I went to town on the pot one color at a time.

I started with the black paint. I figured a darker base would work the best for building off. I didn't use a brush for this, I actually spread the paint on with my fingers. It gave a pretty good look to the pot. I kinda wonder if I shouldn't have just left it at that, but I pressed on.


 The next layer you can't see very well. The whitish, glue like stuff is what I put on.  It's the glow in the dark paint which is pretty transparent once you start spreading it around.


 I put some white paint on my pallet near the black so I could smear them together and get a grayish layer.


Then I put some brown mixed with black on to simulate a bit of clinging dirt.


 I topped the whole thing off with another layer of glow in the dark paint and here it is.


I may put some chips in the pot, or put another layer of paint on it so I can stick some spider webbing to it. There's something not quite right about my Worm Pot as yet but I'm sure I’ll figure it out if I stare at it for long enough.

Friday, September 16, 2011

Mummy Head


Going in the theme of decorative heads, I thought I would post my mummy head.  I made it using Martha Stewart's Head Waiter Tray instructions.  I call it a mummy head because I have no intention of putting it on a tray, it will most likely end up in my entryway on the table there.

As per Martha's instructions I found a foam head at a local beauty supply store.  They are surprisingly affordable, this one cost me something like $4.


Step one is to crinkle up paper towels.  I would like to add one note to what Martha directs.  Don't use paper towels with little dot like divots on them.  Get the fancy ones, like Viva, that are nice and flat.  The divots don't melt out when you get the towels wet or start gluing them and, honestly, the whole ply thing gets in the way too. If I were to do this again, I would use different paper towels.


I then dipped the crinkled paper towels into coffee as instructed.  They don't look like much at this point, just a sodden blah-ish brown. I didn't try for an even soaking, just a quick dip and wring out.  The lighter patches look nice later on.  I also dunked some cheese cloth to age it.  Martha uses gauze, I found gauze to be more expensive since it's usually sterile for use on wounds.  Cheese cloth is cheap and can be found in the paint aisle of places like Walmart and Lowes.


Next, I had to let the dunkes bits dry out.  Being the lazy person I am, I figured what would happen naturally would happen faster outside in the sun.  So, I put my paper towels and the cheese cloth out in the back yard to dry.  It really didn't take very long.  I checked them every 10-15 minutes and when the outside was crispy  feeling and had some very dark brown sections I stretched them out a bit so that they could dry all the way through.


Drying done, I tore the paper towels into smallish bits.  This part isn't in Martha's written instructions, I found it in the accompanying video.  I think it was a good call; it was much easier to blend towel bits when they had uneven edges.  I would actually suggest tearing off the factory cut edges because they leave weird lines on the head once you start assembling it.


Here we have the head as I started covering it with the paper towel bits.  Again, I varied my technique from the instructions.  I didn't want a food based glue as I store my Halloween decorations outside and I saw no reason to go buy Mod Podge so instead I used Elmer's glue and thinned it a little with some warm water. Worked like a charm.


After a bunch of gluing and getting covered in glue and bits of paper towel I achieved this:


You see the line from the chin, over the cheekbones to the ear area?  That's what happens when you don't tear the natural edges off the paper towels.  On the whole, I think she looks pretty good though.  I'll post pics of where she ends up when I actually start decorating.  I get over excited about Halloween so I do try not to put decorations up for real until October 1st.  Sometimes it even works. (-;