The prop that I have for you today is very similar to the Mutant Plant Specimen #1 but it differs on a few very key points. Firstly, it doesn't glow. I had wanted it to, but that didn't work out when I was looking for parts. Secondly, it takes a bit more work than Specimen #1. Don't let that worry you, it takes more work to make but it's still really easy. The original plan was to find some colored glow in the dark paint, the kind that dries mostly clear but have a color when it glows, but when nothing meeting that description was forthcoming the plan got altered a bit.
Happily, I came across some tiny pots of neon paint. $1 at JoAnn's no less. Neon may not glow in the dark, but it does respond to blacklight. The plan became to paint select parts of the plant with neon paint and hopefully keep the plant looking reasonably normal in the process.
DIY Mutant Plant Specimen #2

The process for this is the same as for Specimen #1 except for the flower painting process. I'll go through a quick review of that but for full instructions see the other post (linked above).
Step 1: Prep work
Paint your jar lid and trim your flowers/plants so that they fit nicely in your jar.
Step 2: Check you plants for blacklight reactivity
Do a quick check of your plants under a blacklight. It's possible that they will already have parts that respond to blacklight. If they do you'll see it and you can plan your painting accordingly.
Step 3: Paint your plant life
You'll want to be careful with painting these plants. Unlike the Specimen #1, you aren't going to slap on a layer of spray paint and call it good. Instead, use the paint as an accent decoration. Try painting greens with neon green, pink sections with neon pink, and so on. If you use a very thin layer of paint, dry brushing is a good way to start, your plants will still have a realistic look but with neon accents. When you put them under blacklight the bits you painted with neon will glow brightly. It takes a bit of practice to get your flowers looking good after painting. Using really small amounts of paint helps.
 |
| Back into the bag of rejected plant parts! |
 |
| I'm not sure what plant these were supposed to be, they look almost like water plants, but I liked them. |
 |
| These are obviously supposed to be dogwood flowers. The added bonus is that tree flowers on something that looks like a water plant will throw off anyone who knows a bit of botany. I had a bunch of other flowers that I sorted through and I picked the dogwood flowers because they already had a bit of pink on the petal tips. |
 |
| Paint! |
 |
| Paints under UV. The CFL black light puts off a lot of light so this doesn't look quite as awesome as it does in person. |
Step 4: Build your arrangement
Stick your clay in the jar lid, as per Specimen #1, and poke your plants into the clay. Cover any remaining clay with mossy bits.

Step 5: Assemble jar (and label it if you want)
 |
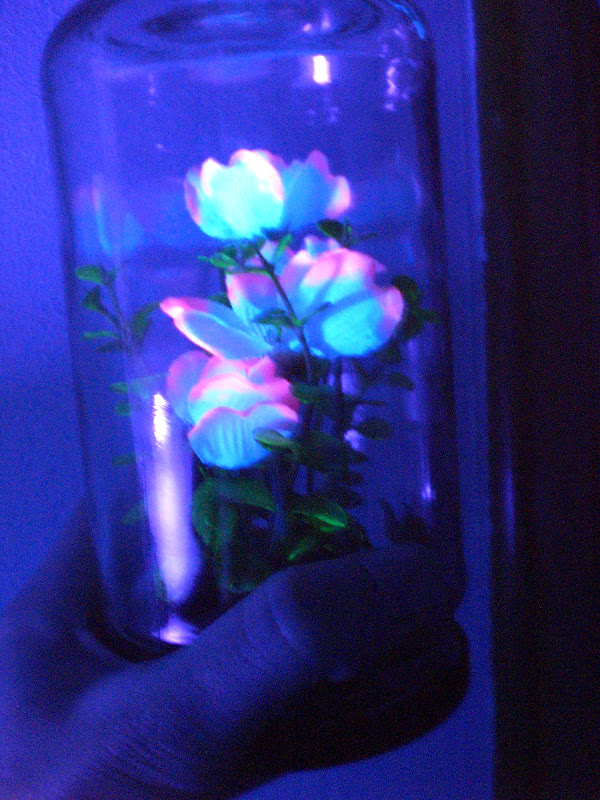
| Flower close up |
The neon pink didn't turn out looking quite as natural as I had hoped, but the greenery turned out really well. You can't really tell that the leaves have been painted at all, which was the goal. Having the plant look normal under regular light gives you some fun options when it comes to lighting, too. You don't have to display the plant under black light the whole time, you could have it on a switching mechanism or something along those lines. You could even put a black light spot on it so that it only looks neon when directly in the light. Options are fun!
No comments:
Post a Comment